About Zoom Connection, Disconnection, and Passcode Settings

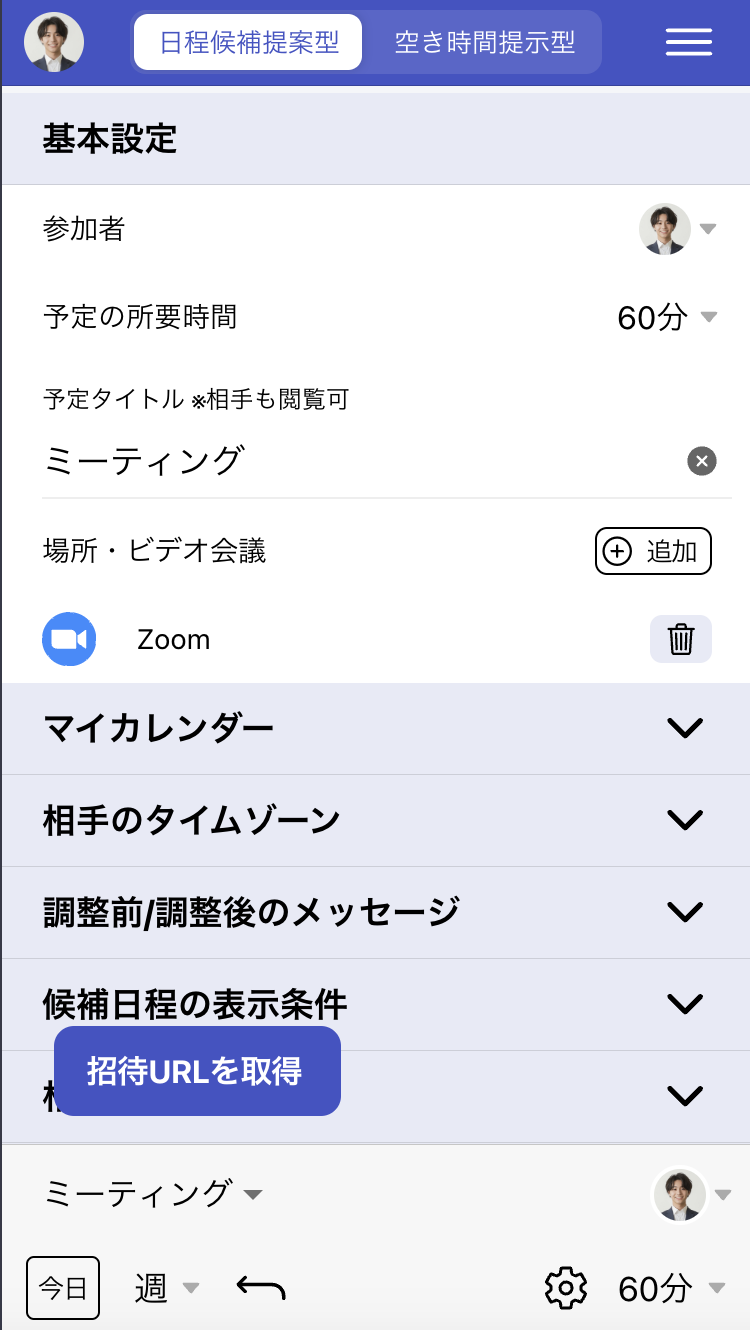
By connecting with Zoom and adding it to the "Location/Video Conference" settings in the scheduling page, a Zoom meeting URL will be automatically generated when the schedule is confirmed, and both the event and Zoom URL will be registered in Google Calendar.

Connect with Zoom

1. Click "Connect" for Zoom in the Settings page

Click Connect for Zoom in the Settings page

2. Click "OK"

Some browsers may block pop-ups. In such cases, please allow pop-ups.

Click OK

3. Follow the instructions on the Zoom connection page

Please note the following:

  • Make sure the Google account you use for your Aitemasu account matches the Google account used for authentication on the Zoom connection page.
  • Do not connect one Zoom account to multiple Aitemasu accounts. Using the same Zoom account may prevent proper generation of meeting URLs.
  • If you're using an organizational Zoom account, please check these settings beforehand.
Follow the instructions on the Zoom connection page

4. After completing the process on the Zoom connection page, return to Aitemasu and click "Connect" again.

After completing the process on the Zoom connection page, return to Aitemasu and click Connect again

5. Zoom Connection Complete

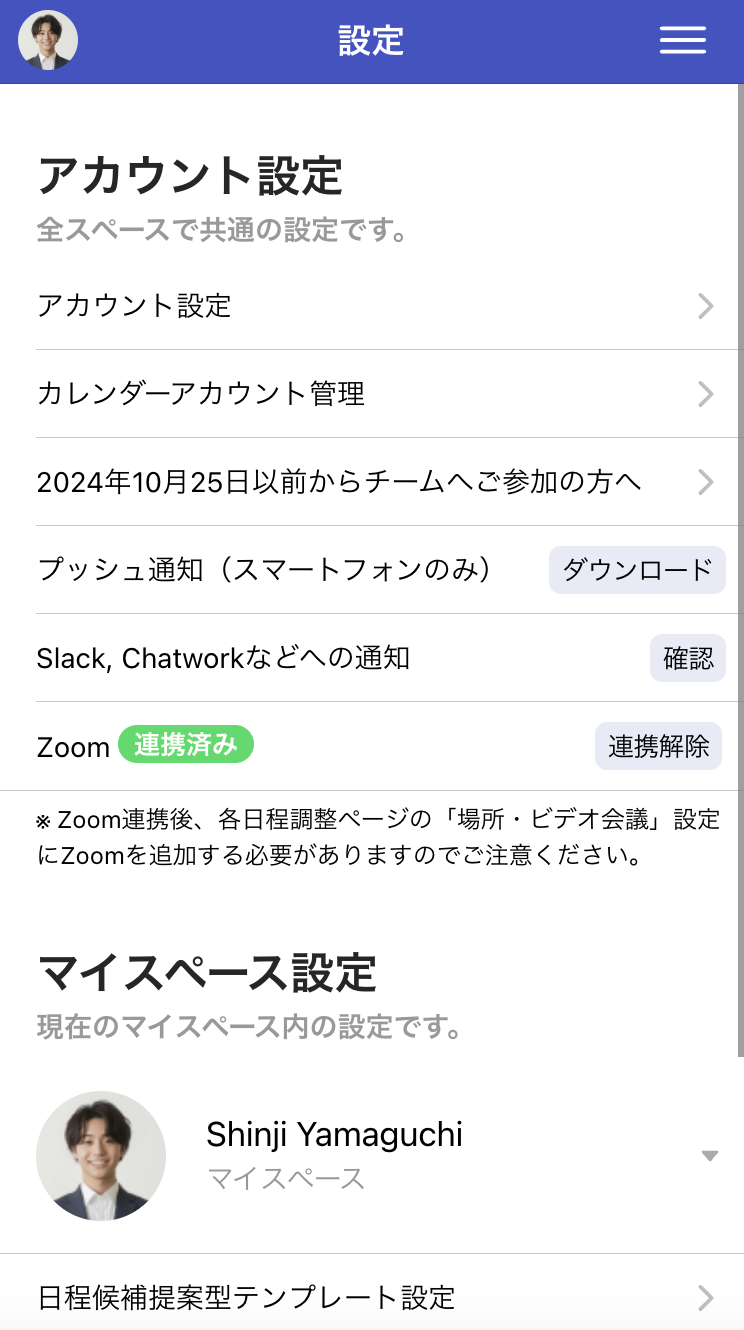
When you see "Connected", the Zoom connection is complete.
However, Zoom URLs won't be automatically generated upon schedule confirmation yet. Please proceed to Generate Zoom Meeting URL upon Schedule Confirmation.

Zoom Connection Complete

Disconnect from Zoom

1. Click "Disconnect" for Zoom in the Settings page

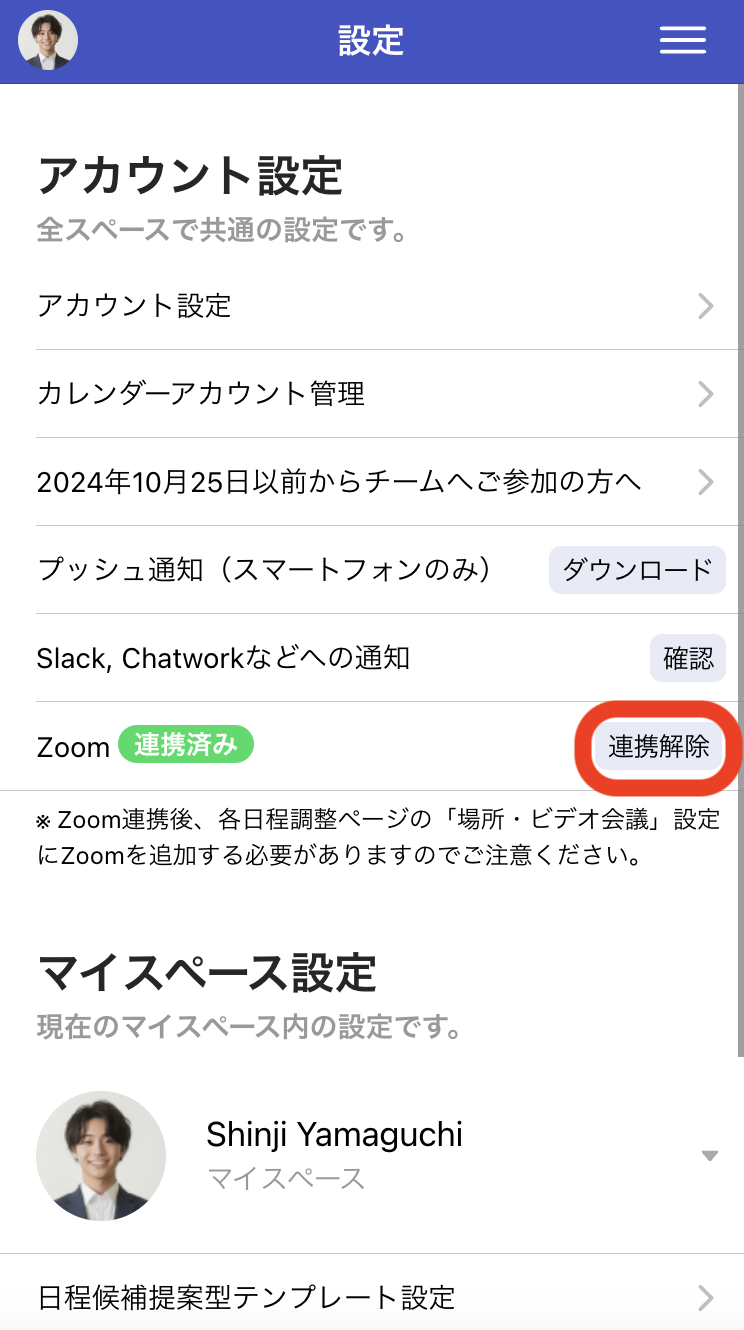
This will delete all Zoom authentication data stored in Aitemasu and disconnect the integration with Zoom.
Previously generated Zoom web meeting URLs will remain valid.
If you encounter an error when issuing a Zoom URL during scheduling, please disconnect the integration once and then reconnect it.

Click Disconnect for Zoom in the Settings page

Generate Zoom Meeting URL upon Schedule Confirmation

1. Click "Add location" in the "Location/Video Conference" settings when creating a scheduling page

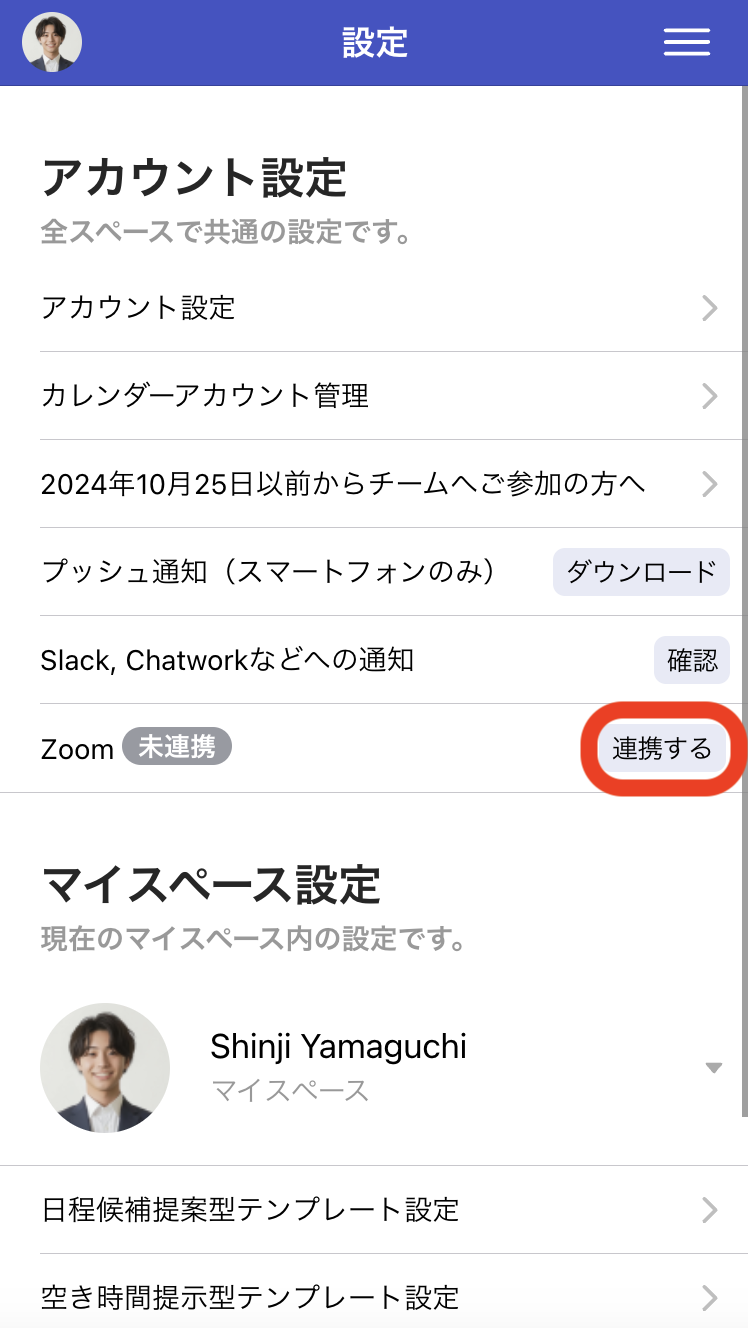
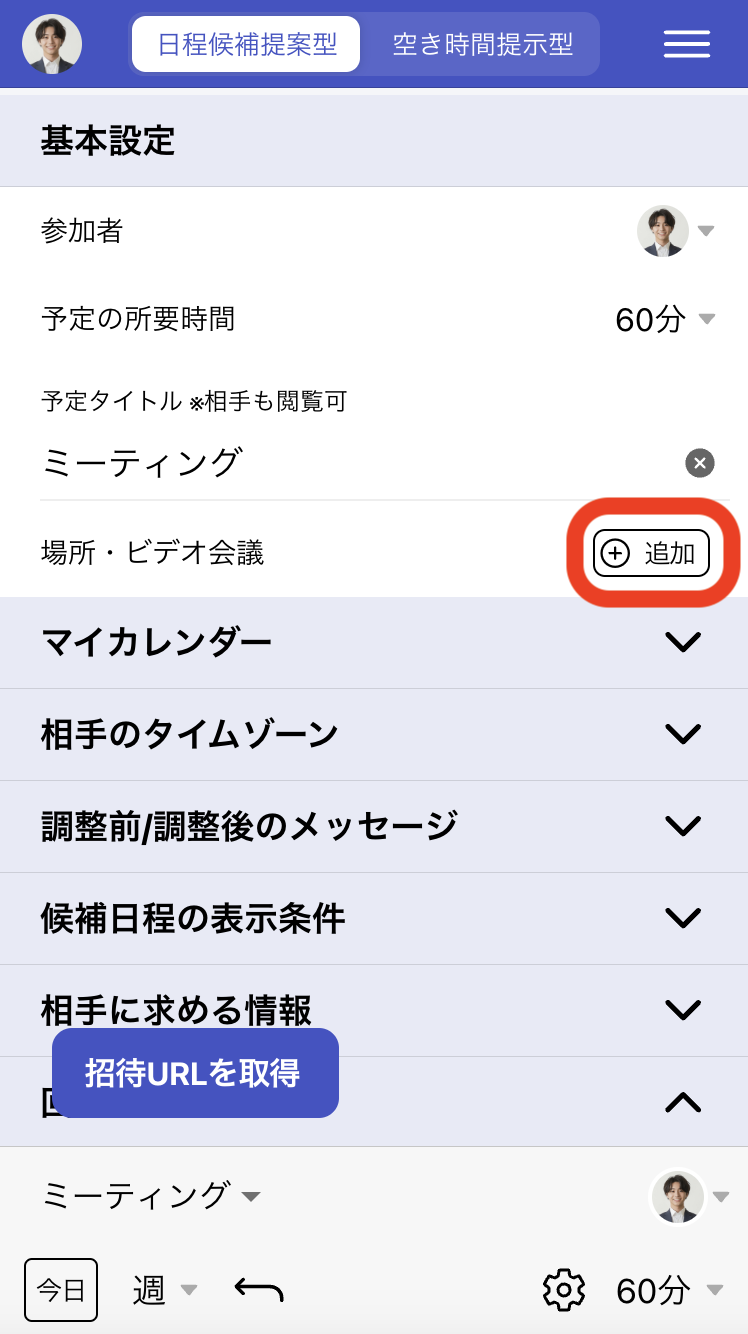
You need to complete Connect with Zoom beforehand.

Click Add location in the Location/Video Conference settings when creating a scheduling page

2. Add "Zoom"

Once the screen shows this state, the setup is complete. Continue with normal scheduling, and the Zoom meeting URL will be automatically generated.

Add Zoom

Use a Fixed Web Meeting URL (Personal Meeting URL) upon Schedule Confirmation

1. Click "Add location" in the "Location/Video Conference" settings when creating a scheduling page

Click Add in the Location/Video Conference settings when creating a scheduling page

2. Add "An address or other URL"

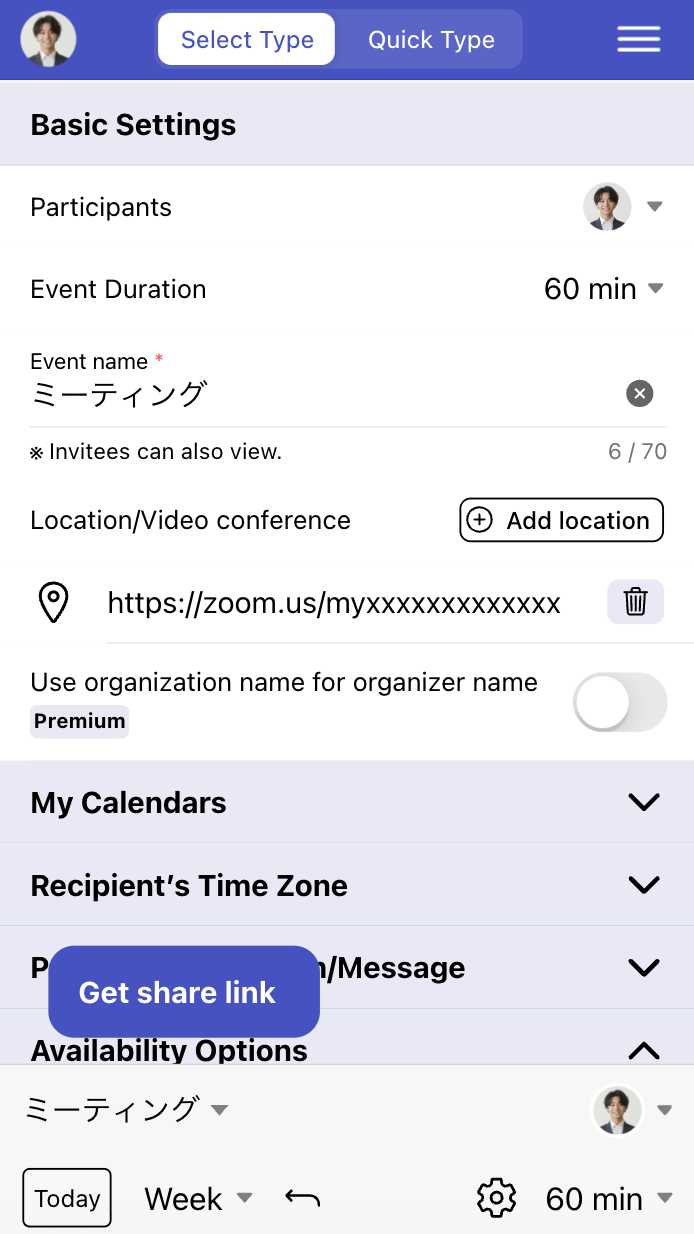
When you add "An address or other URL", an input form will appear where you can enter your personal meeting URL.

Add Other URL/Address

Important Notes about Zoom Accounts for Proxy Scheduling and "OR" Rule Scheduling

For proxy scheduling or scheduling using the "OR" rule, where users other than yourself might be assigned as the person in charge, all users specified as participants must complete Zoom connection in addition to adding Zoom in the "Location/Video Conference" settings when creating the scheduling page.

About Zoom Meeting URL Passcodes upon Schedule Confirmation

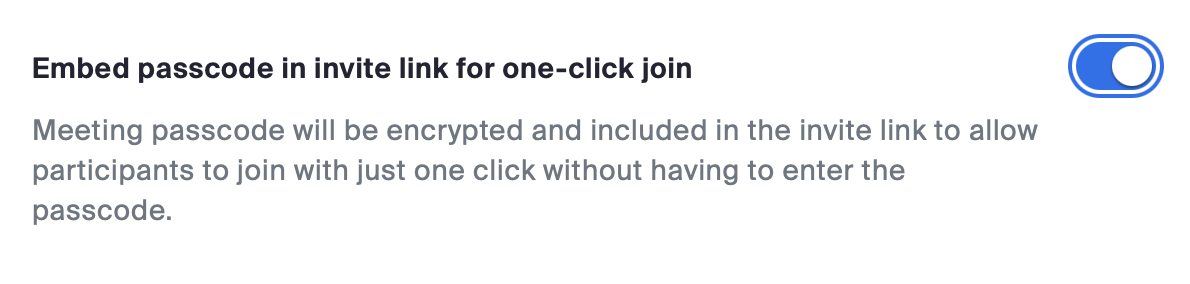
Updated 10/04/2025: Meeting ID and passcode are now always displayed together.

All Zoom meeting URLs automatically have a passcode of up to 10 digits set.
However, depending on the Zoom setting "Embed passcode in invite link for one-click join: ON/OFF", the meeting passcode display will vary.

Embed passcode in invite link for one-click join
  • When ON: In schedule confirmation notifications and confirmed data, the passcode is embedded in the URL as https://us02web.zoom.us/j/XXXXXXXXX?pwd=XXXXXXXXXXXXXXXXX, allowing one-click join to the Zoom meeting.
  • When OFF: In schedule confirmation notifications and confirmed data, the passcode appears as https://us02web.zoom.us/j/XXXXXXXXX (Passcode: 70134).